Thursday, October 4, 2012

Hazelnut Dark Chocolate Cookies


The idea for these cookies began while I was staring at a bag of hazelnuts that's been sitting in the pantry for about 6 months.  They were bought and used in a couple of recipes but we discovered maybe we don't like hazelnuts.  At least not as raw nuts by themself. Nutella is probably the one hazelnut based thing that I like, and probably so much so because it's paired with chocolate.  Anyway, these cookies were inspired by that bag of hazelnuts that had no use and a love of Nutella.  

The hazelnuts were toasted and ground into a meal that was used, along with whole wheat pastry flour, as the base of the cookie.  A few simple other ingredients and these cookies turned out perfect.  They remind me of the chocolate chip cookies my mom makes, which are perfect every time, but these have that little something different.  Next time you are thinking of chocolate chip cookies - give these ones a try. 

They bake up tiny, perfectly nutty, and loaded with dark chocolate.  I made them on a recent day off and they were the exact thing that a dreary and rainy week day needed-the smell of toasted nuts and butter wafting through the apartment. 


Hazelnut Dark Chocolate Cookies
adapted from Nestle Toll House recipe

  • 1/2 cup unsalted butter
  • 1 1/2 cup whole wheat pastry flour
  • 1/2 cup hazelnut meal
  • 1/2 tsp baking soda
  • 1/4 tsp salt
  • 3/4 cup brown sugar
  • 2 tsps vanilla extract
  • 1 egg & 1 egg yolk, lightly beaten
  • 1 1/3 cup dark chocolate chips
  1. To make hazelnut meal: toast one cup of hazelnuts in the oven at 350 degrees for about 10 minutes. Keep a close eye on them as you don't want them to burn.  Once they are toasted, remove, and place in a dish towel to remove skins.  It's okay if some of the skins are left on.  Once you have removed the skins place hazelnuts in a food processor and process until they have a flour/meal like consistency.  Be careful not to over process as it will start to turn into hazelnut butter. 
  2. Brown your butter.  Place butter in a pan over med-high heat, stirring occasionally until you begin to see small brown flecks and it gives off a nutty aroma; approximately 10-20 minutes. Remove from heat and let cool.
  3. Whisk together flours, baking soda, and salt in a small bowl.
  4. Once butter has cooled whisk together with sugar in a mixing bowl.  Add eggs and vanilla extract.  
  5. Once all your wet ingredients are mixed, add your dry ingredients and mix until combined.  Fold in chocolate chips.
  6. Roll dough into one inch balls and bake at 350 for about 7 minutes.  

Wednesday, September 26, 2012

Cape Cod Weekend

Spent the weekend in Cape Cod this past weekend for an eagerly anticipated wedding of two close friends.  It was a weekend filled with friends, family, love, food and drinking.

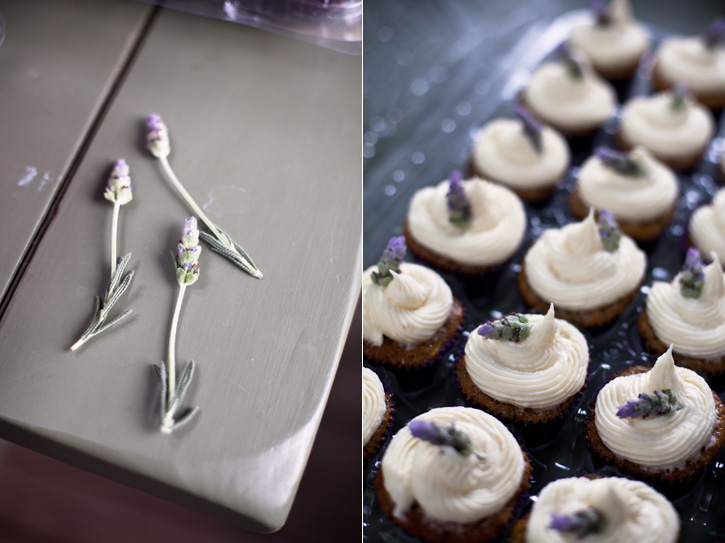
Friday was spent frosting and decorating cupcakes (homemade by one of the bridesmaids!), making bridesmaids bouquets, delivering table arrangements and prepping for the rehearsal dinner.  


Following the rehearsal was a backyard cookout and a beach bonfire.  


No pictures from Saturday; the bridal party was up at 7 AM and we didn't stop until we all crashed late Saturday night after a beautiful ceremony and LOTS of dancing.  


Sunday was a perfect Cape Cod day.  A big brunch, a flats walk, and an afternoon whiffle ball game.  

A few of us stayed until Monday.  Sunday night we relaxed and enjoyed the amazing sunset.  

Monday we had a late morning and then finally made our way to the beach where we had sandwiches, soaked up some sun and swam.  

Wednesday, September 19, 2012

Apple Picking & Rustic Apple Cake


After spending a relaxing weekend in Connecticut with family and friends, Monday hit hard. You know those days where your mind just won't quit. Churning over thought after thought about what you are doing with your life until it works you in to a panic?   You know you are being over exaggerative about it all but you can't just tell your brain to turn off. The answer to these days for me is to pause for a moment, take a deep breath, and focus on something simple.  


A huge bag of apples from apple picking over the weekend sat on the kitchen counter.  I knew the way to keep all my anxieties at bay for the moment was to get in the kitchen and concentrate on something else.  Each year my family goes apple picking at Belltown Hill Orchards.  


You can pick all you want and we usually leave with more apples than could ever be eaten or baked before we end up getting tired of them.  


It's an activity I look forward to each Fall and, as an added bonus, you get to eat apple fritters after you've picked your apples.  


The cake batter is simple, replacing butter with oil and just slightly laced with a hint of cinnamon and nutmeg.  I had a small batch of homemade amaretto which I allowed the apples to soak in while I prepared the cake batter. Walnuts stud the top of the cake and the whole thing comes together practically effortlessly.  


Rustic Apple Cake
adapted from Joy of Baking

  • 3/4 cup sugar
  • 2 eggs
  • 1/4 cup olive oil
  • 1 teaspoon vanilla
  • 3-4 apples, peeled and thinly sliced
  • 2 tablespoons Amaretto
  • 1/2 cup whole wheat pastry flour
  • 2 teaspoons baking powder
  • 1/2 cup lowfat milk
  • big pinch of both cinnamon and nutmeg
  • 1/4 cup walnuts
  • confectioner's sugar to sprinkle on top
  1. Preheat oven to 350 degrees.
  2. Peel and slice apples.  Place in a bowl with Amaretto and let sit while you prepare the batter. 
  3. Beat eggs and sugar together for 2 minutes (I did this by hand, you can also use an electric mixer)
  4. Stir in oil and vanilla
  5. Stir in flour and baking powder
  6. Stir in milk
  7. Add the apples to your batter, mixing to allow the batter to coat the slices.  Pour batter into a well greased 9-inch round pan. Sprinkle walnuts on top
  8. Place in oven and allow to cook 45-55 minutes, or until turning golden and toothpick inserted comes out clean. Allow to cool for 10 minutes, top with confectioner's sugar and enjoy!